
Johnny Detail · Complete care checklist
Prepare, wash, clean and protect your vehicle with complete wheel, exterior, interior, paint-correction, waxing and ceramic-coating checklists.
Start with inspection and safe preparation, then follow the chapters that apply to your vehicle. The complete instructions, tools, completion cues and troubleshooting stay available as you work. Optional correction and protection paths depend on the finish and its condition.
Browse all detailing guides · Explore our auto detailing service
All steps
Wheels and tires
Exterior washing and decontamination
Interior cleaning and odor-source removal
Conditional paint correction
Wax or sealant protection
Ceramic coating as an alternative protection path
A complete care chapter
Wheels and tires
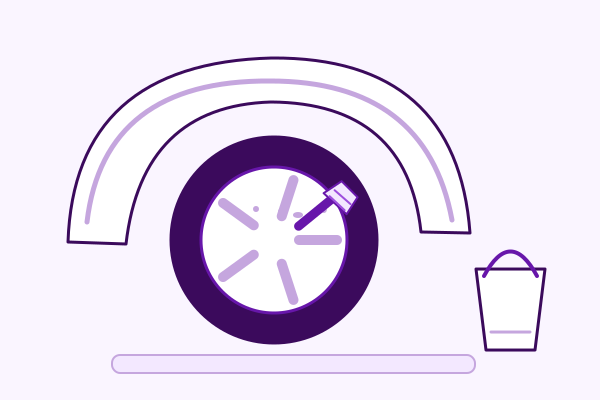
Tire and brake safety: Any car tire dressing belongs only on a clean, compatible sidewall when the product and tire manufacturer permit it. Keep it off tread, tire contact surfaces and brake components. A cosmetic dressing does not fix cracking or other tire damage.
Introduction
Goals: Remove heavy brake dust, iron contamination, road grime, and old dressings from wheels and tires. Restore appearance and apply protective tire dressing.
Estimated Time: 30–60 minutes.
Difficulty: Beginner to Intermediate.
When to Perform: First in any full detailing process (before body work) to prevent contamination of clean paint.
Environmental Considerations: Contain runoff from brake dust (contains heavy metals). Use eco-friendly wheel cleaners when possible.
Tools & Supplies Checklist
- Dedicated wheel bucket(s)
- Tire cleaner
- Iron remover or wheel cleaner with iron-removing properties
- Various brushes: tire scrubber, wheel woolies/barrel brush, wheel face brush, soft detailing brush
- Foam cannon (optional but recommended)
- Pressure washer/hose
- Clean microfiber towels (dedicated for wheels)
- Tire dressing/applicator or brush
- PPE: Gloves, eye protection, dust mask (brake dust is hazardous)
- Optional: Wheel well cleaner, extensions for barrels
1. Pre-Rinse Wheels and Tires
Purpose: Remove loose dirt before chemical application.
Technique: Thorough rinse with pressure washer or hose, including behind wheels if accessible.
Back to checklist2. Apply Tire Cleaner
Purpose: Break down rubber oxidation, old dressings, and grime.
Technique: Spray generously on tires. Dwell 1–2 minutes (or per product). Do not let dry.
Back to checklist3. Scrub Tires
Purpose: Mechanically remove loosened contaminants.
Technique: Use dedicated tire scrubber. Agitate thoroughly. Repeat cleaner + scrub 2–3 times for heavily soiled tires.
Back to checklist4. Apply Iron Remover to Wheels
Purpose: Dissolve embedded iron from brake dust.
Technique: Spray on wheel faces and barrels (where accessible). Dwell 3–5 minutes. Watch for color change. Rinse thoroughly.
Safety: Formulations vary; follow the product label and safety data sheet for PPE and finish compatibility. Avoid hot wheels.
Back to checklist5. Rinse Tires and Wheels
Purpose: Remove all cleaners and loosened debris.
Technique: Thorough rinse, including barrels if possible.
Back to checklist6. Foam and Agitate Wheels
Purpose: Deep clean faces and accessible barrels.
Technique: Apply thick foam. Scrub faces with wheel brush and tight areas with soft detailing brush. Use barrel brush for inside (rinse brush frequently).
Back to checklist7. Clean Wheel Barrels (Inside)
Purpose: Remove hidden brake dust buildup.
Technique: Use barrel brush or woolies. Agitate thoroughly. Rinse often.
Safety: Be cautious around brake components and sensors.
Back to checklist8. Clean Wheel Faces
Purpose: Restore shine and remove remaining residue.
Technique: Wheel brush for main areas; soft brush for intricate details. Rinse frequently.
Back to checklist9. Rinse and Dry Wheels
Purpose: Remove all residue and prevent water spots.
Technique: Final rinse. Dry with dedicated clean microfiber towel (never the body towel). Use blower if available.
Back to checklist10. Final Wheel Cleaner Wipe (Optional but Recommended)
Purpose: Ensure spotless surface before protection.
Technique: Light spray of wheel cleaner or quick detailer. Wipe with clean microfiber.
Back to checklist11. Apply Tire Dressing
Purpose: Restore deep black appearance and provide UV protection.
Technique: Ensure tires are completely clean and dry. Apply evenly with applicator or brush. Avoid getting product on wheel faces. Let dwell 10–30 minutes. Wipe off excess for a dry-touch, no-sling finish.
Safety/Common Mistakes: Applying to wet or dirty tires causes poor adhesion and sling. Over-application leads to sling onto paint.
Pro Tip: Water-based dressings sling less. Let cure fully before driving. For best longevity, apply thin layers and buff excess.
Visual Cue: Even, deep black sidewall with no white residue or sling.
Back to checklistInspection & Final Touches
- Check for missed brake dust (especially inner barrels).
- Ensure no dressing on wheels or paint.
- Inspect wheel wells if part of service.
- Take photos.
Optional Advanced Variations
- Jack vehicle safely for full barrel access (professional only).
- Ceramic wheel coatings for long-term protection.
- Dedicated wheel well cleaning and dressing.
Troubleshooting
- Brake dust returns quickly: Consider ceramic coating or more frequent maintenance.
- Tire dressing slings: Tires were not dry enough or too much product used.
A complete care chapter
Exterior washing and decontamination
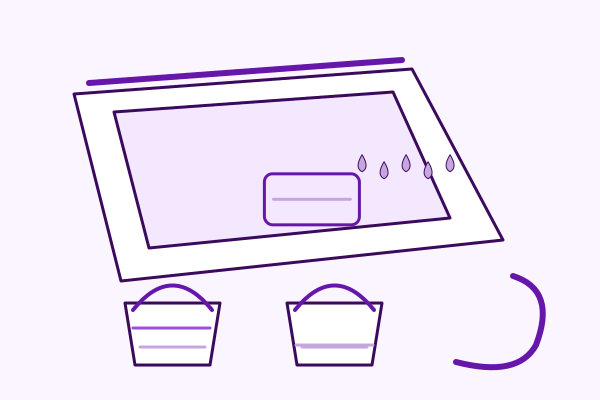
Introduction
Goals: Remove loose dirt, road film, embedded contaminants (iron particles, industrial fallout), and prepare the paint for protection. Achieve a clean, swirl-free, glossy surface.
Estimated Time: 60–120 minutes (varies by vehicle size, dirt level, and tools).
Difficulty: Beginner to Intermediate.
When to Perform: Every 2–4 weeks for maintenance washes or immediately before applying protection. Always work in shade on a cool surface.
Critical Note on Sequence:
Clean Wheels & Tires FIRST (see separate checklist). This prevents brake dust and grime from splashing onto freshly cleaned paint. If wheels must be done after, protect the body with plastic sheeting or work carefully.
Environmental Considerations: Use a foam cannon only when its use actually reduces water use compared with your normal method. Choose biodegradable, pH-neutral soaps. Dispose of wastewater responsibly.
Tools & Supplies Checklist
- 2–3 clean buckets + grit guards (highly recommended)
- Foam cannon + pressure washer (or garden hose)
- pH-neutral car shampoo
- Iron remover (fallout remover)
- Clay bar or synthetic clay mitt/towel + lubricant (or car soap solution)
- Plush microfiber wash mitt (body only)
- Multiple clean microfiber drying towels + detailing spray/drying aid
- Soft detailing brushes
- All-Purpose Cleaner (APC) or dedicated jamb cleaner (diluted)
- Glass cleaner (ammonia-free for tinted windows)
- PPE: Nitrile gloves, safety glasses
- Optional: Leaf blower/air dryer, pre-wash snow foam, tar/bug remover, spot-free rinse system
1. Pre-Rinse the Vehicle
Purpose: Remove loose dirt and dust before any mechanical contact to minimize scratches.
Tools: Pressure washer or hose with adjustable nozzle.
Technique: Start at the top and work downward using a wide fan spray. Focus on wheel wells and lower panels. Avoid high pressure on trim, badges, cameras, or sensors.
Safety: Wear eye protection. Never point jet at skin or delicate components.
Common Mistakes: Skipping this step or using excessive pressure.
Pro Tip: Combine with a thick snow foam pre-soak for better dwell time and easier cleaning.
Visual Cue: Water runs mostly clear; heavy loose dirt is gone.
2. Prepare the Two-Bucket Wash System
Purpose: Prevent swirls by keeping the soap solution clean. The rinse bucket removes grit from the mitt.
Tools: Two buckets, grit guards, pH-neutral shampoo.
Technique: Bucket 1: Warm water + shampoo (per product dilution, typically 1–2 oz per gallon). Bucket 2: Clean rinse water only. Change rinse water when dirty.
Pro Tip: Add a third bucket for wheels if not already cleaned. Use grit guards in all buckets.
Back to checklist3. Apply Pre-Wash Snow Foam
Purpose: Chemically loosen stubborn dirt, bugs, and road film with dwell time and minimal agitation.
Tools: Foam cannon, dedicated pre-wash or pH-neutral shampoo.
Technique: Apply thick foam from bottom up or top down. Cover entire vehicle. Let dwell 5–10 minutes (never let dry).
Safety: Do not apply to hot paint.
Common Mistakes: Letting foam dry on the surface.
Pro Tip: Use a dedicated pre-wash product for heavily soiled vehicles.
4. Wash Using Two-Bucket Method
Purpose: Safely remove remaining contaminants with minimal marring.
Technique:
- Work top to bottom, one small section at a time (e.g., roof, hood, then sides).
- Dip mitt in soap bucket → wash section with straight-line or gentle motions.
- Rinse mitt thoroughly in clean water bucket and wring out.
- Rinse vehicle section frequently.
- Pay extra attention to the lower third of the vehicle.
Common Mistakes: Circular motions, washing in direct sunlight, not rinsing mitt often enough.
Pro Tip: Wash one panel at a time and rinse immediately.
5. Decontaminate with Iron Remover
Purpose: Chemically dissolve embedded iron particles (brake dust, rail dust) that cause orange spotting and potential corrosion.
Tools: Iron remover, PPE.
Technique: Apply after the initial wash/rinse on a clean surface. Spray liberally. Dwell 3–5 minutes (watch for purple/red color change). Agitate gently if needed. Rinse thoroughly. Repeat for heavy contamination.
Safety: Many formulas are acidic — wear gloves and eye protection. Ventilate area. Test on inconspicuous spot. Do not let dry on paint.
Common Mistakes: Applying to a very dirty car (less effective); insufficient rinsing.
Pro Tip: Iron remover before claying reduces marring and clay consumption. Color-changing formulas provide visual feedback.
Visual Cue: Solution changes color where iron is present; paint feels smoother after rinsing.
Back to checklist6. Clay Bar Decontamination (as needed)
Purpose: Mechanically remove bonded contaminants for a glass-smooth surface and better protection adhesion.
Tools: Clay bar or synthetic clay mitt/towel + lubricant (soap solution or dedicated clay lube).
Technique:
- Knead clay flat.
- Lubricate section generously.
- Glide clay in straight lines with light pressure (no scrubbing).
- Fold clay frequently to expose clean surface.
- Wipe residue with clean microfiber towel.
- Work section by section.
Safety: Never clay dry paint. Excessive pressure causes swirls/marring. Use fine-grade clay for maintenance.
Common Mistakes: Insufficient lubrication; using dirty/old clay; circular motions.
Pro Tip: Test paint smoothness with a plastic bag. Synthetic clay mitts are faster and less likely to mar. Clay every 3–6 months or as needed for daily drivers.
Visual Cue: Paint feels like glass; clay glides effortlessly.
Back to checklist7. Final Rinse
Purpose: Remove all soap, iron remover, clay lube, and loosened contaminants.
Technique: Thorough top-to-bottom rinse with pressure washer or hose. Pay attention to crevices, badges, and door jambs. Final low-pressure rinse to help water sheet off.
Back to checklist8. Dry the Vehicle
Purpose: Prevent water spots and prepare surface for protection.
Tools: Plush microfiber drying towels + optional leaf blower/air dryer + drying aid spray.
Technique:
- Use blower first (top to bottom, into crevices).
- Dry with clean towels using straight-line or patting motions (never circles).
- Start at the top and work down. Use fresh towels frequently.
- Apply drying aid for lubrication and extra protection.
Common Mistakes: Using one towel too long; circular motions; drying in direct sun.
Pro Tip: A good blower dramatically reduces towel use and swirls. Dry door jambs and mirrors thoroughly.
Visual Cue: No water beads or mineral spots remain.
Back to checklist9. Clean Door Jambs and Crevices
Purpose: Remove hidden dirt that can transfer to clean panels.
Tools: Diluted APC or jamb cleaner, soft brush, microfiber towels.
Technique: Spray, agitate with brush, wipe clean, and dry. Avoid excessive liquid near electronics or inside the cabin.
Back to checklist10. Clean Exterior Glass
Purpose: Streak-free visibility and professional finish.
Tools: Ammonia-free glass cleaner, dedicated clean microfiber glass towels.
Technique: Spray, wipe in straight lines (up-down then side-to-side to check streaks). Use two-towel method. Be gentle on tinted windows.
Safety: Use tint-safe cleaners only.
Pro Tip: Clean glass after protection application to avoid overspray issues.
Back to checklistInspection & Final Touches
- Inspect in bright light or with inspection lamp for missed spots, swirls, or water spots.
- Touch up as needed.
- Optional: Apply quick detailer or spray sealant for interim protection.
- Document with before/after photos.
Optional Advanced Variations
- Heavy Decontamination: Add dedicated tar/bug remover before foam.
- Ceramic-Coated Vehicles: Use only pH-neutral products approved by the coating manufacturer. Skip or minimize clay/iron remover.
- Waterless Wash: For light dirt only, using proper waterless products and technique.
- Eco Option: Biodegradable soaps and minimal-water foam methods.
Troubleshooting
- Swirls: Review two-bucket discipline, mitt rinsing, and motion technique.
- Water spots: Dry immediately; consider spot-free rinse system.
- Iron remover ineffective: Re-wash first for better results.
This section prepares the paint for protection. Proceed to Paint Protection checklist once the vehicle is clean and dry.
A complete care chapter
Interior cleaning and odor-source removal
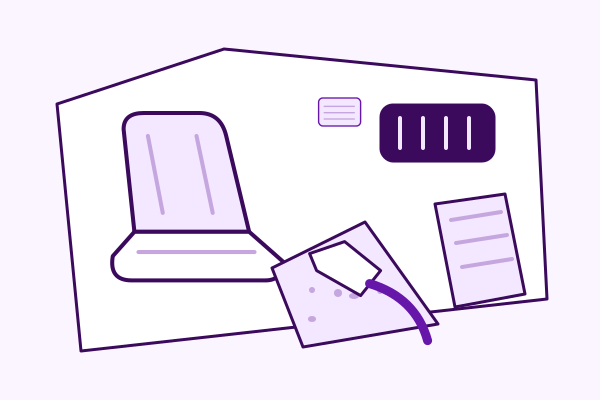
Introduction
Goals: Remove dirt, stains, pet hair, odors, and allergens. Protect surfaces and restore a fresh, clean cabin.
Estimated Time: 60–150+ minutes (heavily soiled vehicles take longer).
Difficulty: Intermediate.
When to Perform: Every 3–6 months or as needed. Before or after exterior work.
Tools & Supplies Checklist
- Shop vac or detailing vacuum with attachments
- Upholstery/carpet brushes + soft detailing brushes
- All-Purpose Cleaner (APC) diluted appropriately
- Foaming carpet/upholstery shampoo
- Drill with upholstery brush attachment (optional but highly effective)
- Heated carpet extractor or wet/dry vac
- Steam cleaner
- Ozone generator (with safety protocols)
- Microfiber towels
- Leather cleaner/conditioner (if applicable)
- Interior dressing/protectant (UV protection)
- PPE: Gloves and eye protection appropriate to the cleaner and steam equipment. An ordinary mask does not protect against ozone; exclude people from any ozone process and use a qualified exposure-control procedure
1. Remove and Clean Floor Mats
Purpose: Clean the dirtiest removable items separately.
Technique: Vacuum or shake out. For rubber: Rinse, apply APC + brush, rinse, dry. For carpet: Vacuum thoroughly.
Back to checklist2. Remove Loose Debris and Pet Hair
Purpose: Loosen embedded hair and dirt before vacuuming.
Technique: Use upholstery brush on carpets, fabric seats, and mats. Work in sections.
Back to checklist3. Vacuum Entire Interior Thoroughly
Purpose: Remove loosened dirt and prevent it from becoming mud during cleaning.
Technique: Use crevice tool, brush attachments. Vacuum under seats, between cushions, trunk, and all crevices. Multiple passes.
Back to checklist4. Clean Dust from Crevices and Vents
Purpose: Remove dust from hard-to-reach areas.
Technique: Soft brush + vacuum or compressed air. Pay attention to dashboard, steering wheel, door panels, and vents.
Back to checklist5. Clean and Protect Interior Panels and Trim
Purpose: Remove grime and apply UV protection.
Technique: Diluted APC + microfiber or brush. Wipe clean. Apply dressing (matte or gloss as preferred). Avoid oversaturating electronics.
Back to checklist6. Shampoo Upholstery and Carpets
Purpose: Deep clean fabric surfaces.
Technique: Spray foaming shampoo. Agitate with brush or drill brush attachment (excellent for heavy soil). Work in sections.
Back to checklist7. Extract Stains and Solution
Purpose: Remove dirt and cleaning solution to prevent resoiling.
Technique: Use heated extractor. Multiple passes with clean water. Drain and refresh solution frequently. Focus on high-traffic areas and stains.
Back to checklist8. Steam Clean Heavily Soiled or Hard-to-Reach Areas
Purpose: Clean compatible crevices, seams, rails and cup holders. A sanitizing claim requires a validated product or process; do not steam a bonded headliner unless its manufacturer explicitly permits it.
Technique: Use steam cleaner on appropriate settings. Wipe residue immediately.
Safety: Be careful with electronics and delicate materials.
Back to checklist9. Dry Thoroughly
Purpose: Prevent mold and odors.
Technique: Use extractor, fans, or allow air drying with doors/windows open.
Back to checklist10. Ozone Treatment for Odors (as needed)
Purpose: Neutralize deep-seated odors (smoke, pets, food).
Technique: Empty vehicle. Remove the odor source, clean and dry the interior, and use ventilation or an appropriate enzyme treatment first. Ozone is a specialist-only optional procedure: use a documented, unoccupied-space exposure-control process with controlled ventilation and measured clearance, never a generic runtime or ventilation period.
Safety (Critical): Ozone is a respiratory irritant. No people, pets, or plants in vehicle during treatment or immediately after. Follow all safety guidelines. Ventilate well before re-entry.
Common Mistakes: Not drying fully before ozone; insufficient ventilation afterward.
Pro Tip: Use only when odors are present. Maintenance interiors rarely need ozone.
Back to checklistInspection & Final Touches
- Smell test and visual inspection.
- Wipe all glass (interior).
- Reinstall clean mats.
- Apply leather conditioner if applicable.
- Document results.
Optional Advanced Variations
- Full hot water extraction for heavily soiled fleet or pet vehicles.
- Leather-specific cleaning and conditioning protocol.
- Fabric guard/protectant after cleaning.
Troubleshooting
- Odors return: Source not fully removed or insufficient drying/ozone.
- Stains reappear: Not enough extraction passes or solution left behind.
A complete care chapter
Conditional paint correction
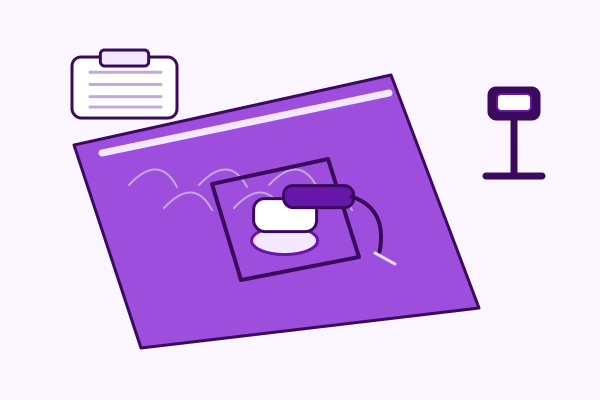
Conditional procedure: Correction is needed only when inspection supports it. Start with the least aggressive suitable process; sanding is specialist work after finish assessment. Do not correct matte finishes, decals, raw plastic or an unknown repaired surface using a generic painted-panel procedure.
Introduction
Goals: Level the clear coat by removing deep defects (scratches, swirl marks, orange peel, etching) through controlled abrasion, then refine the surface to restore gloss and clarity. This prepares the paint for protection.
Estimated Time: 2–6+ hours (highly dependent on defect severity, vehicle size, and experience level).
Difficulty: Advanced. This process carries significant risk of damaging the clear coat if performed incorrectly.
When to Perform: Only when necessary for severe defects that compound and polish alone cannot fully remove. Perform after thorough exterior wash, decontamination (iron remover + clay), and drying. Always after Wheels & Tires and before final protection.
Critical Warnings:
- Wet sanding removes clear coat material. Factory clear coat is often thin (especially on modern vehicles and edges/curves). Over-sanding can burn through to basecoat or primer, requiring repainting.
- This is not a routine maintenance step. Start with the least aggressive method (compound only) and escalate only if needed.
- Requires excellent lighting, patience, and frequent inspection. Practice on test panels or older vehicles first.
- Not recommended for beginners without hands-on training.
Environmental Considerations: Wet sanding generates slurry — contain and dispose of wastewater properly. Use eco-friendly compounds and polishes when possible.
Tools & Supplies Checklist
- Masking tape (painter’s/masking tape)
- Wet/dry sandpaper: 2000 grit and 3000 grit (or progression as needed)
- Bucket of clean water + car shampoo (for lubrication)
- Spray bottle with water/soap solution
- Dual-action (DA) polisher (highly recommended over rotary for safety)
- Backing plates: 6" and 3"
- Cutting pad (foam or wool for compound)
- Polishing pad (foam)
- Cutting compound
- Refining polish
- Plenty of clean microfiber towels
- Inspection light or sunlight for defect checking
- PPE: Nitrile gloves, safety glasses, dust mask/respirator (for dry phases)
- Optional: Sanding block or DA sanding pad system, clay bar (post-sanding), IPA panel wipe solution
Pre-Correction Inspection (Recommended Addition)
Before starting:
- Wash, decontaminate, and dry the vehicle thoroughly.
- Inspect paint in direct sunlight or with a strong inspection light/swirl finder.
- Identify defect depth and location.
- Decide: Can defects be removed with compound/polish only? If yes, skip to compounding. Wet sanding only for deep, level defects.
1. Mask Off Edges and Sensitive Areas
Purpose: Protect trim, badges, rubber seals, plastic, and adjacent panels from compound, polish, or sanding slurry.
Tools: High-quality masking/painter’s tape.
Technique: Apply tape carefully around all paint edges, trim pieces, emblems, and any areas where compound or sandpaper could migrate. Press firmly for a good seal.
Safety/Common Mistakes: Tape can leave residue if left too long in sun — remove promptly after work.
Pro Tip: Mask generously. It takes extra time but prevents costly cleanup or damage.
2. Wet Sand with 2000 Grit
Purpose: Level deep defects and orange peel by removing a thin, controlled layer of clear coat.
Tools: 2000-grit wet/dry sandpaper, water + shampoo lubricant, spray bottle.
Technique:
- Keep the surface and sandpaper very wet at all times (water acts as lubricant and flushes debris).
- Use a sanding block or hand for control (or DA with sanding pad if experienced).
- Work in small sections with light, even pressure in straight lines.
- Sand until defects are mostly leveled (check frequently with light).
- Rinse area often to inspect progress.
Safety: Never let sandpaper run dry. Watch water color — milky white is normal (clear coat). If you see color (basecoat), stop immediately — you are burning through.
Common Mistakes: Too much pressure, dry sanding, large sections without checking, skipping finer grit later.
Pro Tip: Work slowly. Less is more. Re-wet constantly. Use plenty of lubrication.
Visual Cue: Surface feels smoother; deep defects are reduced. Water runs milky but no basecoat color appears.
Back to checklist3. Wet Sand with 3000 Grit (or Finer)
Purpose: Refine the 2000-grit scratches and further level the surface.
Technique: Repeat the process from Step 2 using 3000-grit (or finer) sandpaper. Keep everything very wet. Reduce pressure. Focus on removing the coarser sanding marks.
Pro Tip: Many professionals progress through 1500 → 2000 → 3000 grit. Some use 5000+ for final refinement before compounding.
Back to checklist4. Thorough Rinse and Dry
Purpose: Remove all sanding slurry and particles before machine polishing.
Technique:
- Rinse the entire vehicle thoroughly with water (pressure washer recommended).
- Ensure no sanding residue remains (it can cause scratches during compounding).
- Dry the vehicle completely using clean microfiber towels and/or a blower.
Safety/Common Mistakes: Leaving residue will create new scratches. Dry thoroughly before next step.
Back to checklist5. Apply Compound to Cutting Pad
Purpose: Remove remaining sanding marks and deeper defects through mechanical abrasion.
Tools: DA polisher, cutting pad, cutting compound.
Technique:
- Apply compound to the pad in a “+” pattern or small dots.
- Spread product on a small section of paint first (without machine running or at very low speed).
- Work in small sections (2x2 ft or less).
6. Compound the Surface (3–4 Passes)
Purpose: Cut away remaining defects and sanding marks.
Technique:
- Use DA polisher at appropriate speed (usually medium for cutting).
- Apply light to moderate pressure.
- Make 3–4 overlapping passes per section in a crosshatch pattern.
- Keep the pad moving; do not stop in one spot.
- Wipe residue frequently with a clean microfiber towel.
- Clean or replace pad as it loads with compound.
Safety/Common Mistakes: Excessive pressure or speed on edges/curves can burn through clear coat. Overheating the paint.
Pro Tip: Use proper lighting to monitor progress. Work one section at a time. Clean the pad often for best results. DA polishers are much safer than rotary for most users.
Visual Cue: Surface becomes smoother and begins to show improved clarity.
Back to checklist7. Apply Polish to Polishing Pad
Purpose: Refine the surface, remove fine compound haze, and maximize gloss.
Tools: DA polisher, polishing pad, refining polish.
Technique:
- Clean the surface and switch to a clean polishing pad.
- Apply polish in “+” pattern.
- Spread on section first.
8. Polish the Surface (2–3 Passes)
Purpose: Achieve high gloss and remove any remaining haze or micro-scratches from compounding.
Technique:
- Use DA polisher at appropriate speed for polishing (usually lower than cutting).
- Light pressure.
- 2–3 overlapping passes per section.
- Wipe residue with clean microfiber.
- Inspect with light — surface should be glossy and defect-free.
Pro Tip: Multiple light passes with clean pads produce better results than heavy pressure. This step is critical for a “wet look.”
Back to checklist9. Final Surface Preparation (Before Protection)
Purpose: Remove any remaining oils or residues so protection bonds properly.
Technique: Perform a thorough IPA panel wipe (or dedicated panel wipe) using clean microfiber towels in straight lines. This step bridges correction and protection.
Note: Follow immediately with the Paint Protection / Waxing checklist for best results.
Back to checklistInspection & Final Touches
- Inspect every panel in multiple lighting conditions (sunlight + inspection lamp).
- Check for remaining defects, haze, or uneven areas.
- Re-polish any problem spots.
- Take before/after photos under consistent lighting.
- Ensure the surface is completely clean and dry before applying protection.
Optional Advanced Variations
- Machine sanding: Use DA polisher with specialized sanding discs for more control and less mess than hand wet sanding.
- Multi-stage correction: Add a medium-cut compound stage between heavy cut and polish.
- Ceramic coating ready: After polishing and IPA wipe, the surface is ideal for ceramic coating application (longer-lasting protection than traditional wax).
- Show-car level: Additional finer polishing steps or jewelling for maximum depth.
Troubleshooting
- Sanding marks remain after compounding: Increase compound passes, use more aggressive compound, or ensure pads are clean.
- Holograms/swirls after polishing: Usually from dirty pads, too much pressure/speed, or using rotary instead of DA. Re-polish with clean pad and lighter technique.
- Burn-through (clear coat damage): Stop immediately. This usually requires professional repainting. Prevention: Frequent inspection + conservative approach.
- Poor gloss: Insufficient polishing passes or skipping the refining polish step.
- Compound/polish not cutting: Pads loaded with old product — clean or replace them.
Important Final Note
Paint correction (especially wet sanding) is a skill that improves dramatically with practice. When in doubt, be conservative — it is always easier to do another pass than to fix over-correction. After completing this checklist, proceed directly to the Paint Protection checklist for IPA wipe and application of wax, sealant, or ceramic coating.
This advanced module builds on the foundational Exterior Detailing and Paint Protection processes previously covered.
A complete care chapter
Wax or sealant protection
Choose a protection path: Wax/sealant and ceramic coating are alternatives. Follow the chosen product’s preparation, cure and maintenance requirements; do not assume that stacking both improves adhesion or durability.
Introduction
Goals: Apply a sacrificial protective layer that provides gloss, water beading, UV protection, and easier future cleaning.
Estimated Time: 30–60 minutes (plus cure time).
Difficulty: Beginner to Intermediate.
When to Perform: Immediately after thorough exterior detailing and drying, on clean, decontaminated paint.
Note: Traditional wax offers 1–3 months protection. Modern synthetic sealants or ceramic coatings offer longer durability (consider upgrading for daily drivers).
Tools & Supplies Checklist
- Compatible commercial panel-preparation product used at its labelled concentration; do not improvise a universal alcohol recipe
- Clean microfiber towels (plenty)
- Wax product of choice
- Applicator pad (foam or microfiber) or DA polisher with finishing pad
- Optional: 6" and 3" DA polisher/buffer
1. Prepare and Apply IPA Panel Wipe
Purpose: Remove oils, old residues, and fillers for maximum bonding of new protection.
Technique: Spray IPA solution on panel. Wipe thoroughly with clean microfiber in straight lines. Use fresh towel sections frequently. Work section by section. Allow to flash off completely.
Safety: IPA is flammable — good ventilation. Can dry skin.
Common Mistakes: Insufficient wiping (poor bonding).
Back to checklist2. Apply Wax to Applicator/Pad
Purpose: Controlled, even distribution.
Technique: Apply small amount of wax to pad in a "+" pattern or dots. Spread lightly on paint if needed.
Back to checklist3. Apply Wax Evenly
Purpose: Thin, uniform layer for best results and easiest removal.
Technique (Hand): Apply in straight lines or light circles on small sections.
Technique (Machine): Use DA polisher on low speed to spread, then increase slightly to work in. Apply 1–2 thin layers for best durability.
Pro Tip: Less is more. Thick layers are harder to remove and can haze.
Back to checklist4. Allow to Haze and Buff Off
Purpose: Proper curing for protection and easy removal.
Technique: Let product haze per instructions (usually 5–20 minutes). Buff off with clean microfiber towel using straight lines. Use a second clean towel for final polish.
Common Mistakes: Buffing too early or too late; using dirty towels.
Back to checklist5. Final Inspection and Wipe
Purpose: Ensure even coverage and remove any residue.
Technique: Inspect in good light. Touch up high spots. Final buff with clean towel or quick detailer.
Back to checklistInspection & Final Touches
- Water beading test (should sheet and bead nicely).
- Check for even gloss and no haze or high spots.
- Apply additional layer if desired (after first has cured).
Optional Advanced Variations
- Multiple thin layers for maximum durability.
- Carnauba wax for warm show-car glow vs. synthetic for longevity.
- Transition to ceramic coating for 1–5+ year protection.
Troubleshooting
- Poor beading: Surface not clean enough before application.
- Haze remains: Buff longer or use more pressure with clean towel.
A complete care chapter
Ceramic coating as an alternative protection path

Choose a protection path: Wax/sealant and ceramic coating are alternatives. Follow the chosen product’s preparation, cure and maintenance requirements; do not assume that stacking both improves adhesion or durability.
Introduction
Goals: Apply a durable ceramic (SiO₂) coating that provides long-term protection, enhanced gloss, extreme hydrophobicity (water beading), chemical resistance, and easier maintenance compared to traditional wax or sealant.
Estimated Time: 4–8+ hours (including full preparation and application). Full cure takes 24–72 hours (or longer depending on product and conditions).
Difficulty: Intermediate to Advanced. Requires excellent surface preparation and precise application technique.
When to Perform: After complete exterior decontamination, paint correction (if needed), and thorough drying. This is the final protection step. Perform in a controlled environment (garage or shaded area, ideally 50–80°F / 10–27°C with low humidity).
Critical Notes:
- Surface preparation is 80% of success. Any contamination left on the paint will cause coating failure (high spots, poor bonding, or reduced durability).
- Always follow the specific product instructions for the ceramic coating you are using — flash times, cure times, and application methods vary significantly between brands.
- Ceramic coatings are a long-term investment (typically 1–5+ years depending on product quality and maintenance).
Environmental & Safety Considerations:
- Work in a well-ventilated area.
- Wear nitrile gloves and eye protection.
- Some coatings have strong chemical odors.
- Dispose of used applicators and towels according to local regulations.
Tools & Supplies Checklist
- High-quality ceramic coating kit (paint, glass, interior, trim, wheel coatings as needed)
- Applicator blocks + suede or microfiber applicators
- Clean linen or suede cloths
- Plenty of clean, high-quality microfiber towels (edgeless preferred)
- IPA panel wipe solution (or dedicated panel wipe)
- Nitrile gloves, safety glasses
- Good lighting (inspection lamp highly recommended)
- Optional: Coating applicator with LED light, infrared curing lamp (for faster cure in some cases), plastic drop sheets
Pre-Coating Requirements (Mandatory)
Before applying any ceramic coating:
- Complete full Exterior Detailing (wash + decontamination).
- Perform Paint Correction if needed (wet sanding/compounding/polishing).
- Clay bar + final IPA wipe to remove all oils, waxes, and residues.
- Wheels & Tires must be fully cleaned and dry.
- Vehicle must be completely dry and cool to the touch.
1. Ensure the Surface is 100% Clean and Prepared
Purpose: Remove every trace of contamination so the ceramic coating can chemically bond to the clear coat.
Technique:
- Perform a final IPA panel wipe using clean microfiber towels in straight lines.
- Work panel by panel.
- The surface should feel completely clean and free of any residue.
Common Mistakes: Skipping or rushing the final IPA wipe.
Pro Tip: Use two towels — one for wiping, one for buffing. Change towels frequently.
2. Apply Ceramic Coating to Paint (Body)
Purpose: Create a durable protective layer on the paint.
Tools: Applicator block + clean suede/linen applicator, ceramic coating bottle.
Technique:
- Apply 3–5 small drops of coating onto the applicator (do not over-apply).
- Work in small sections (approximately 2x2 ft or 3x3 ft maximum).
- Apply in straight lines: first horizontal passes, then vertical passes (crosshatch pattern) for even coverage.
- Apply light, even pressure.
Safety: Work quickly but methodically. Some coatings flash very fast in warm conditions.
Back to checklist3. Level and Allow to Flash
Purpose: Ensure even coverage and allow the coating to begin bonding.
Technique:
- After application, the coating will begin to “flash” (become hazy or change appearance) — typically 30–90 seconds depending on product, temperature, and humidity.
- Do not wipe too early or too late.
Pro Tip: Use good lighting to watch for the flash. In hotter conditions, flash time is shorter.
Back to checklist4. Wipe Off Excess Coating
Purpose: Remove unbonded coating while leaving the bonded protective layer.
Technique:
- Use a clean microfiber towel.
- Wipe in one consistent direction or with light pressure.
- Use a second clean towel to buff the panel to a high gloss.
- Work quickly once flashing begins.
Common Mistakes:
- Wiping too early (coating streaks or wipes off completely).
- Wiping too late (high spots or difficult removal).
Pro Tip: Fold towels frequently to use clean sections. Have multiple clean towels ready.
5. Apply Additional Coats (If Recommended)
Purpose: Build durability and gloss.
Technique:
- Most coatings recommend 1–2 coats.
- Allow the first coat to cure for the manufacturer’s recommended time (often 1–2 hours or until fully flashed and wiped) before applying the second coat.
- Do not automatically use the entire bottle — follow coverage guidelines for the vehicle size.
Note: Over-application can sometimes cause issues. Quality over quantity.
Back to checklist6. Apply Glass Coating
Purpose: Create extreme water beading and easier cleaning on windows and mirrors.
Technique:
- Apply 3–4 drops to a clean applicator.
- Glide evenly across glass surfaces.
- Allow to flash (usually similar timing to paint coating).
- Wipe off thoroughly with clean microfiber towels.
- Buff to a streak-free finish.
Pro Tip: Glass coatings often provide better hydrophobicity than paint coatings on windows.
Back to checklist7. Prepare Interior Surfaces
Purpose: Ensure proper bonding on interior plastics, vinyl, and leather.
Technique:
- Thoroughly clean all hard interior surfaces (dash, door panels, center console, etc.).
- Remove all stains, oils, and dressings from previous products.
- For fabric upholstery: Most ceramic interior coatings are not suitable for fabric. Use only on hard surfaces or leather (if product allows).
8. Apply Interior Coating
Purpose: Protect interior surfaces from UV fading, staining, and make cleaning easier.
Technique:
- Evenly spray or apply the interior coating.
- Allow to dwell 30–45 seconds (or per product instructions).
- Thoroughly wipe off with clean microfiber towels.
- Buff to desired finish (matte or satin).
Common Mistakes: Applying too much product or not wiping thoroughly (can leave a greasy feel).
Back to checklist9. Apply Trim Coating (Plastic/Rubber Trim)
Purpose: Restore and protect faded exterior plastic trim (bumpers, mirrors, window trim, etc.).
Technique:
- Apply trim coating to a clean applicator or linen.
- Apply evenly to clean, dry trim pieces.
- Wipe off excess immediately or after short dwell time.
- Buff lightly for even appearance.
Pro Tip: Excellent for reviving faded black trim and providing UV protection.
Back to checklist10. Apply Wheel Coating
Purpose: Protect wheels from brake dust adhesion and make future cleaning much easier.
Technique:
- Ensure wheels are completely clean and dry.
- Apply wheel coating to a clean applicator.
- Apply evenly to wheel faces (and barrels if accessible).
- Wipe off immediately or after very short dwell time.
- Avoid getting product on tire sidewalls if using separate tire dressing.
Pro Tip: Wheel coatings dramatically reduce brake dust buildup.
Back to checklistCuring Period (Critical)
- Keep the vehicle dry for at least 24–48 hours (some products require 72 hours or more).
- Avoid washing the vehicle for 5–7 days for full cure.
- Some manufacturers recommend avoiding direct sunlight or extreme temperatures during initial cure.
- Infrared lamps or controlled heat can sometimes accelerate curing (follow product guidelines).
Inspection & Final Touches
- Inspect all surfaces under good lighting for high spots, streaks, or missed areas.
- Re-wipe any high spots immediately if caught early.
- Check glass for streaks.
- Take final before/after photos.
- Apply tire dressing (if desired) only after wheel coating has cured.
Optional Advanced Variations
- Multi-layer systems: Some professional coatings use a base coat + top coat for maximum durability.
- Graphene or hybrid coatings: Newer formulations offering even better performance.
- Interior leather-specific coatings: Use dedicated leather ceramic products when appropriate.
- Maintenance sprays: Many brands offer ceramic boost sprays for periodic maintenance.
Troubleshooting
- High spots / streaks: Wipe immediately with IPA or coating remover if caught early. Prevention: Proper flash timing and clean towels.
- Poor water beading: Insufficient surface preparation or coating applied too thin.
- Coating not bonding: Surface was not fully decontaminated or had old wax/sealant residue.
- Greasy/sticky interior feel: Too much product applied or not wiped off thoroughly.
- Reduced durability: Vehicle exposed to water or washed too soon after application.
Maintenance Recommendations
- Use pH-neutral car shampoo only.
- Avoid automatic car washes with harsh brushes.
- Use ceramic maintenance sprays or quick detailers periodically to refresh the coating.
- Regular washing will keep the hydrophobic properties performing at their best.
This checklist assumes all previous steps (Exterior Detailing, Wheels & Tires, and Paint Correction if needed) have been completed to a high standard. Proper preparation is the single most important factor in achieving long-lasting ceramic coating results.
References and material-specific instructions
The supplied checklists provide the detailed workflow. The following manufacturer and safety references govern the noted material-specific precautions. Product labels, safety data sheets and the exact vehicle manual take priority over generic examples; estimates vary with condition, construction and access.
Keep the care routine going
Use the maintenance and final-inspection instructions in each chapter to plan the next clean. Persistent leaks, damage, unknown finishes or unsafe access need the appropriate specialist before more aggressive work.
Explore our auto detailing service Choose another vehicle guide